There’s something so satisfying about turning everyday items into something beautiful and this Dollar Store butterfly stick craft is one of those feel-good projects.
I love doing crafts like this with my son because we don’t need fancy supplies or a big budget. All we need is just a little imagination, a glue gun, and a handful of jumbo craft sticks from the Dollar Store. It’s easy, cheap, and fast.
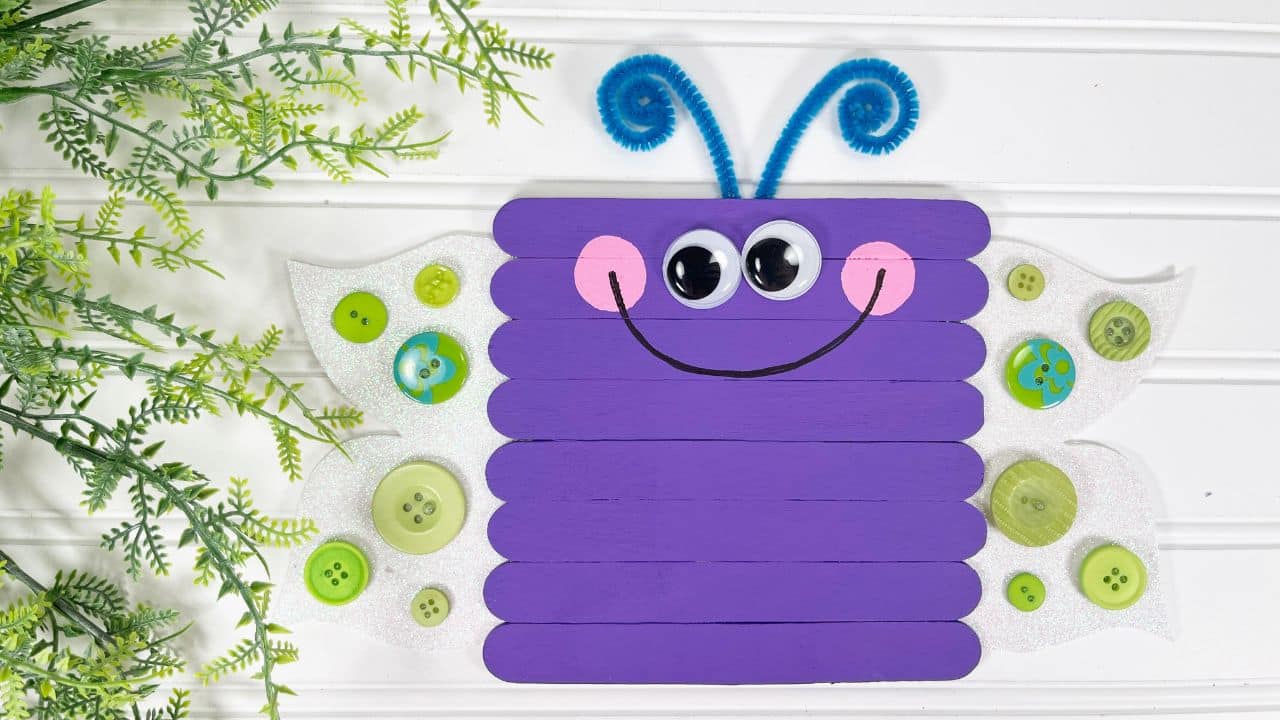
This easy summer craft for kids is perfect for a lazy afternoon, a rainy day backup plan, or even a fun group activity for playdates or camps. The colors are bright, the steps are simple, and in just about 30 minutes, your child has their very own smiling craft stick butterfly complete with sparkly wings and curly antennae.
Materials

- Wooden Craft Sticks, Jumbo – Dollar Store
- Wiggle Eyes – Dollar Store
- Chenille Stems, Black – Dollar Store
- Craft Paint – Purple, Pink
- Craft Foam – White Glitter
- Glue Gun and Glue Sticks – Dollar Store
- Sponge Dabber – Dollar Store
- Paintbrush
- Scissors
- Permanent Marker
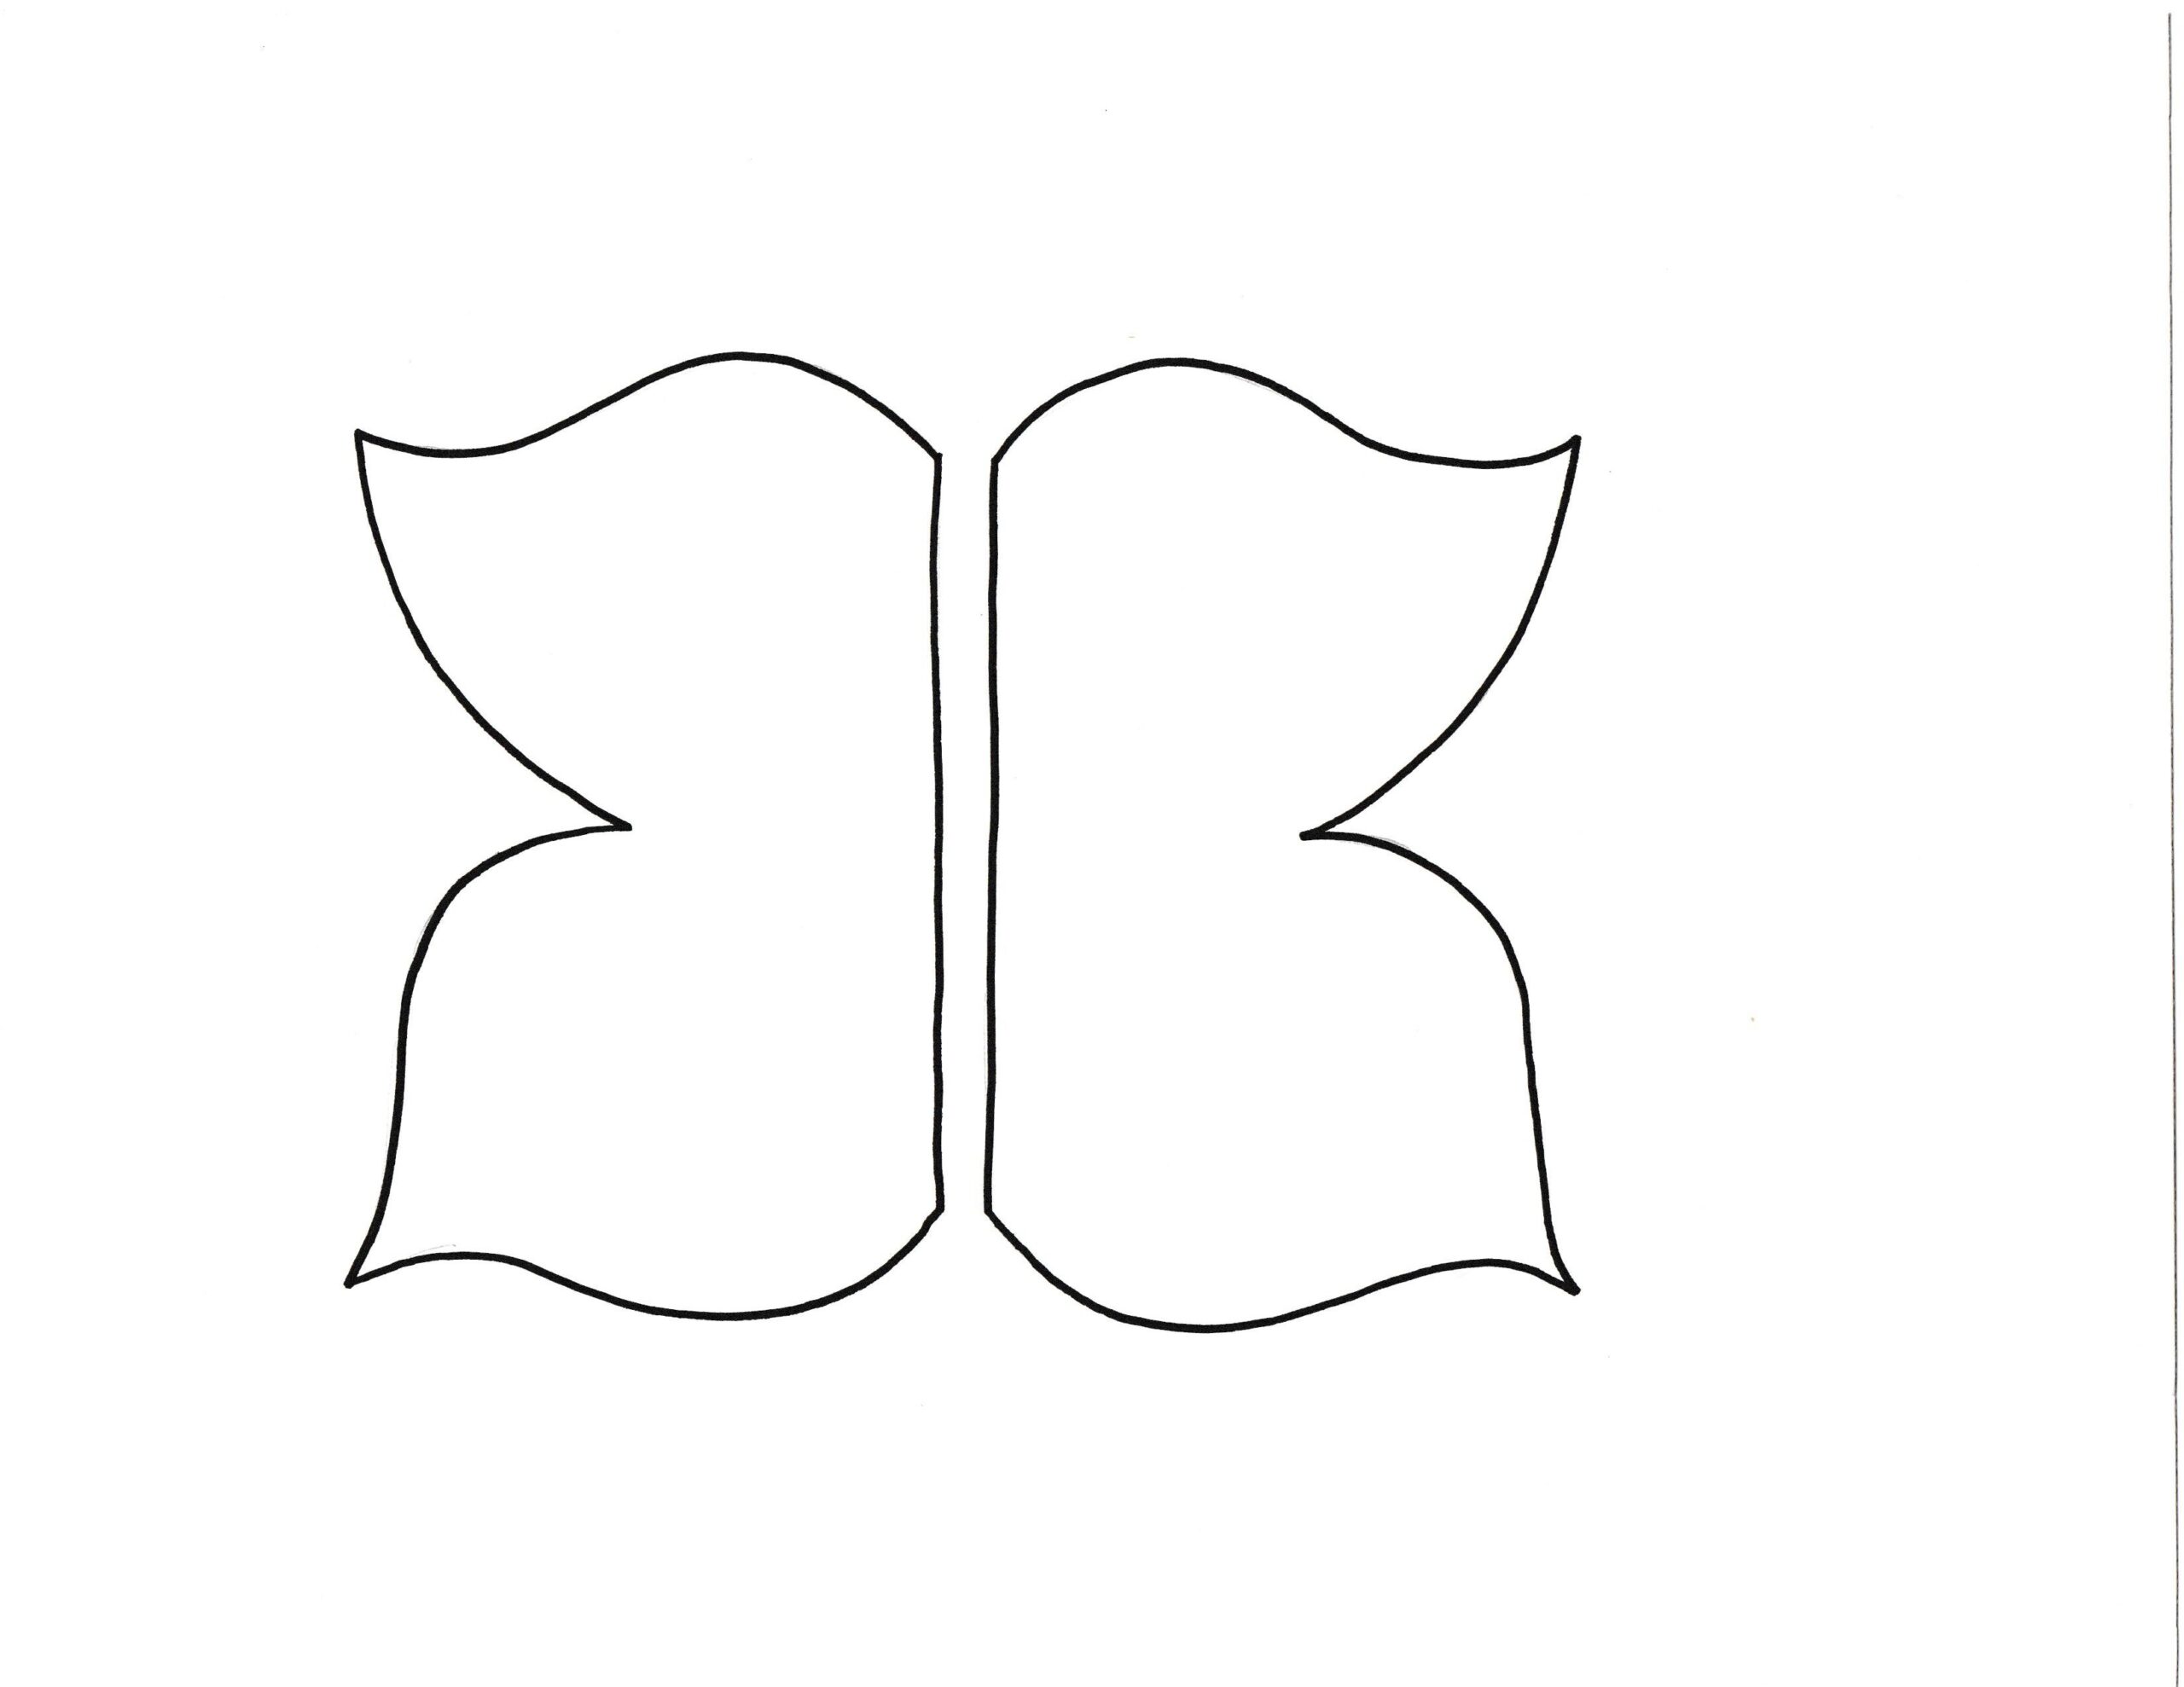
- Free Craft Popcicle Stick Butterfly Pattern
Instructions

STEP ONE
Gather all supplies. To create the Butterfly, line up eight jumbo craft sticks on your work surface. Using scissors, trim additional jumbo craft sticks to the width of the Butterfly and attach with a glue gun and glue sticks.
TIP: You can use liquid craft glue for this project, but you will have to wait for it to dry.
STEP TWO
Base coat the front and sides of the Butterfly with purple acrylic craft paint. Set aside to dry and apply a second coat, if necessary.
STEP THREE
Attach two wiggle eyes to the Butterfly’s face with a glue gun and glue sticks. Create cheeks by dipping a sponge dabber into pink acrylic craft paint and stamping on either side of the face.
STEP FOUR
Download and print the Craft Stick Butterfly Patterns, then cut out with scissors. Trace the wings twice onto the back of white glitter craft foam. Cut out with scissors making sure to cut inside the traced lines for a clean, finished project.
Note: You could also use colored cardstock or craft felt instead of foam for this project.

STEP FIVE
Attach the wings to the left and right-hand side of the back of the Butterfly with a glue gun and glue sticks.
STEP SIX
Attach a variety sizes and colors of green buttons to the Butterfly’s wings as an embellishment.
STEP SEVEN
Bend the blue chenille stem in half, then curl the ends into a swirl to create antennae. Attach to the back top center of the Butterfly with a glue gun and glue sticks.
STEP EIGHT
To finish, draw a large smile from cheek to cheek to create the Butterfly’s mouth.
This is a fun activity to keep the kiddos busy with coloring, counting and motor skills. Make this super cute wooden craft stick Butterfly in just about 30 minutes!
Why You’ll Love This Dollar Store Butterfly Craft

- It’s an educational craft for kids, helping with fine motor skills, color recognition, and early counting.
- It’s a budget-friendly craft that uses common supplies.
- It only takes about 30 minutes to make—perfect for short attention spans.
- It’s easy to customize with different paint colors, wing shapes, or button patterns.
- You can use this as a preschool butterfly craft, summer camp activity, or rainy day project.
Frequently Asked Questions
1. Can I use regular craft sticks instead of jumbo ones?
Yes! You can use regular-sized craft sticks, but keep in mind that your butterfly will be smaller. Jumbo craft sticks are ideal for younger kids because they’re easier to hold and decorate.
2. What kind of glue works best for this craft?
A hot glue gun works best for quick, sturdy results—especially when gluing the buttons and wings. If you’re crafting with little ones, you can use liquid craft glue instead. Just allow extra drying time.
3. Can I substitute craft foam with paper or felt?
Absolutely. White glitter foam gives the wings a nice shimmer, but cardstock, felt, or even construction paper work well too. Choose whatever materials you already have on hand!
4. Is this a good preschool butterfly craft?
Yes! This is a great project for preschoolers and early elementary kids. It helps develop fine motor skills, creativity, and color recognition. You can simplify the steps as needed based on age.
5. How long does this craft take to complete?
This 30-minute butterfly craft is quick and perfect for short attention spans. Younger kids may take a little longer if using glue that needs to dry.
6. Can I make this as a group activity or classroom craft?
Definitely! This is an ideal classroom butterfly craft because the materials are inexpensive and the steps are easy to follow. Pre-cutting the wings and using glue dots can speed things up in group settings.
7. What are the best ways to display the finished butterflies?
These butterflies look great taped to windows, walls, or bulletin boards. You can also glue a magnet to the back and display them on the fridge, or turn them into puppets with a stick glued vertically on the back.