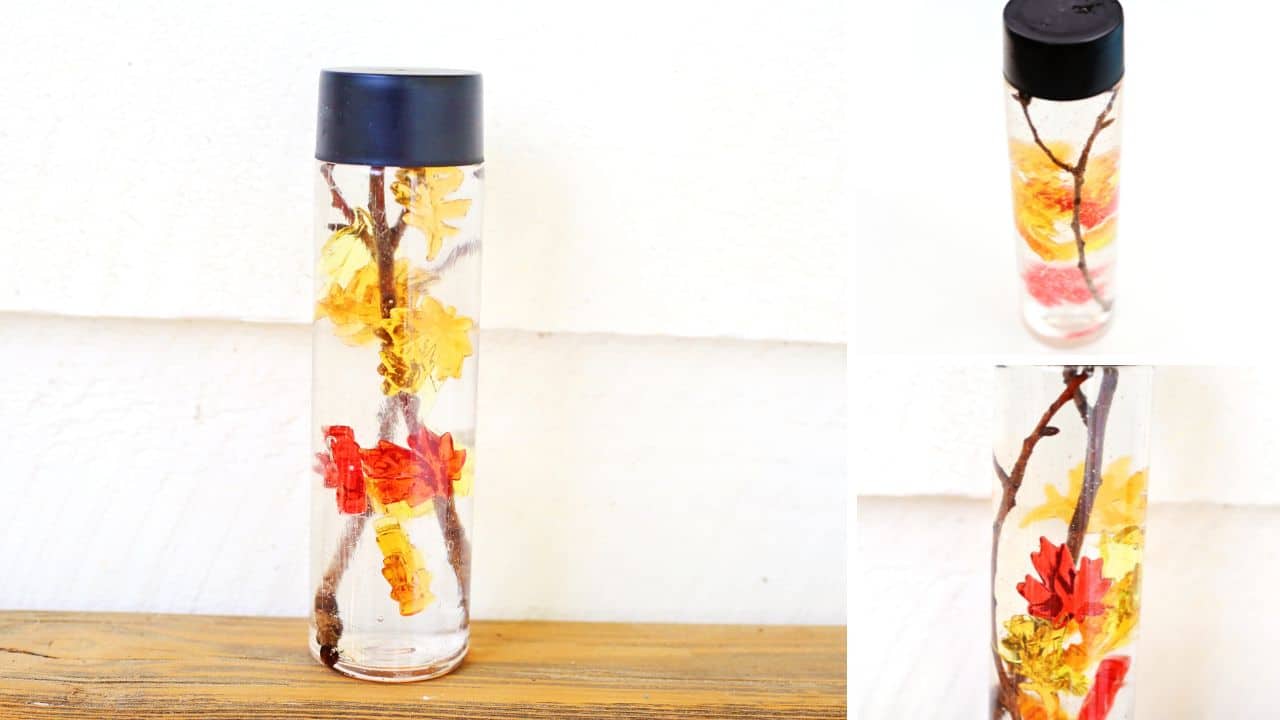
I love fall. The colors, the cooler air, the excuse to make everything feel a little cozier. And one thing my son and I always come back to is sensory bottles. We’ve made a bunch over the past year, but this fall one might be my favorite.
We put it together on a quiet afternoon when the leaves had just started changing, and honestly, it felt like bringing a tiny piece of autumn inside (yes, it’s my favorite time of year). If your kid loves sensory play (or just needs a calm activity that won’t end with glitter on your ceiling), this is it.
Supplies and Materials
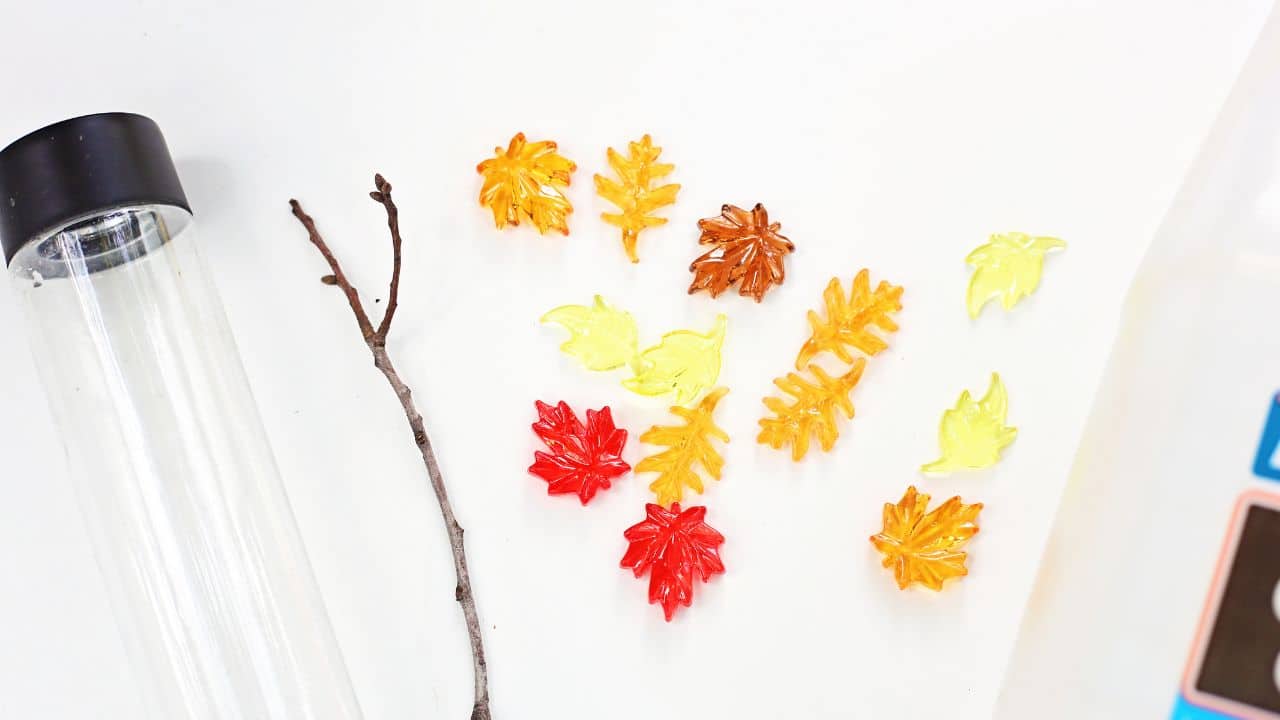
Here’s what we used to make our fall sensory bottle. You don’t need anything fancy. Most of this we had at home already. The acrylic leaves were from a craft store, but you could also use glitter, foil leaves, or whatever tiny fall-themed bits you have. The sticks were straight from our backyard.
- Clear sensory bottle or empty plastic bottle
- Water
- Clear glue
- Small acrylic leaf pieces
- 1–2 small sticks (trimmed to fit snugly inside the bottle)
Instructions
These steps are super easy to follow and don’t take more than 5-10 minutes. Let your kid help where they can because t’s part of the fun.
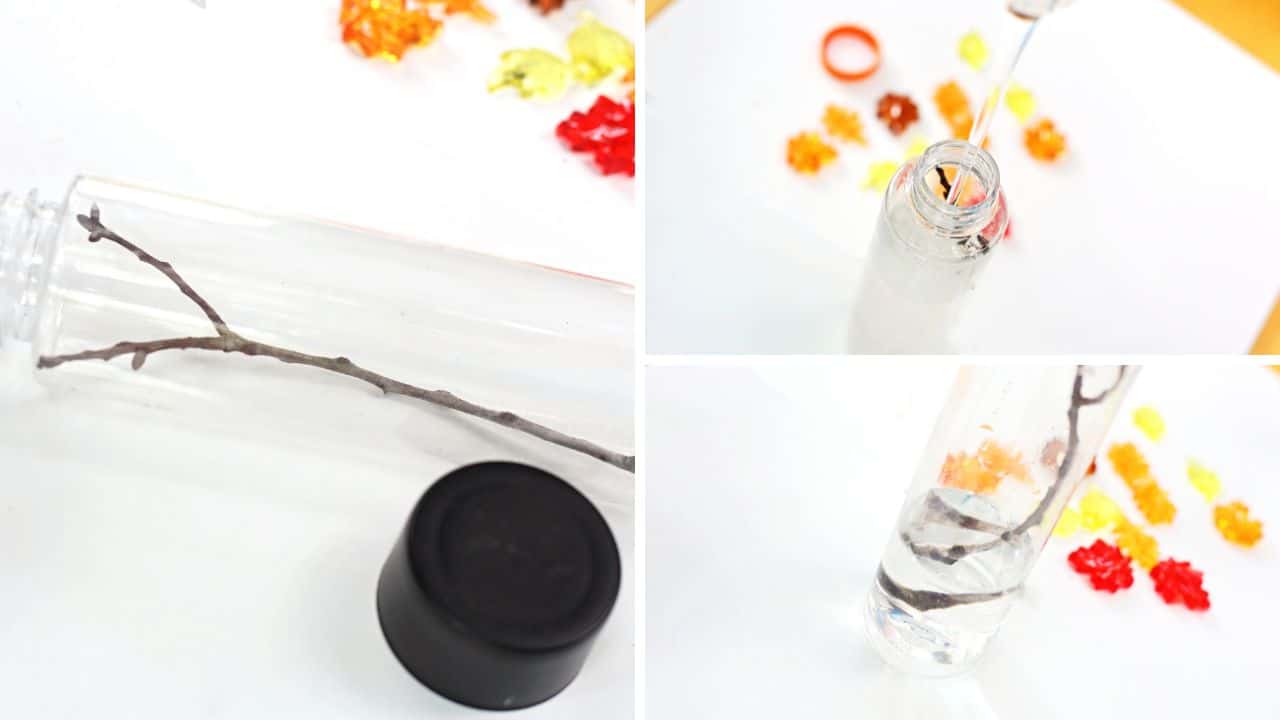
- Add the Sticks: Place 1–2 small sticks into the bottle. Try to wedge them in so they stay put. They look like little tree branches and make the whole bottle feel more like a fall scene.
- Add Water: Fill the bottle about a quarter of the way with water. This helps thin out the glue a bit and gives the leaves some room to float.
- Add Acrylic Leaves: Drop in your leaves! We used a mix of reds, oranges, and yellows. My son kept calling them “leaf confetti,” and honestly, that’s exactly what they looked like.
- Fill with Clear Glue: Top off the bottle with clear glue. The more glue you use, the slower the leaves fall. It’s kind of mesmerizing once it’s all in there.
- Seal the Lid: Tightly screw on the lid. I also added hot glue around the rim just to be safe because my son likes to “shake it like a storm.”
- Swirl and Watch: Now tilt it, flip it, and give it a gentle swirl. The leaves drift and fall like they’re floating off a tree in slow motion. It’s surprisingly calming to watch.
Benefits of the Fall Sensory Bottle

You’re going to love this fall sensory bottle. It’s simple to make, but it does so much. It supports your child’s development and sparks their curiosity in the best way. Here are just some of the awesome things this activity encourages:
- Visual Tracking: The leaves drift slowly, giving kids a chance to follow them with their eyes—great for focus.
- Calming Tool: Perfect for quiet time or when your child needs a little help calming down.
- Nature Connection: They get to interact with real and pretend fall elements without any mess.
- Fine Motor Skills: Swirling, shaking, and tilting the bottle helps those little muscles get to work.
- Imaginative Play: It becomes more than a bottle. It’s a story, a game, a pretend forest in motion.
- Language Development: As they play, they naturally talk about what they see—colors, movement, and ideas about fall.
- Science Exploration: You can sneak in simple science chats about gravity, liquid density, and how seasons change.
Other Sensory Bottles You’re Going to Love
- Dinosaur Sensory Bottle
- Ocean Sensory Bottle
- I-Spy Sensory Bottle
Frequently Asked Questions
Can I use real leaves instead of acrylic ones?
You can, but real leaves might break down in the water over time. If you want to try it, make sure they’re dry and small. We prefer acrylic because they last longer and keep their color.
What if I don’t have clear glue?
You can use hair gel or a mix of water and corn syrup. It’ll change how the leaves float, but it still works.
What kind of bottle is best?
We used a Voss-style plastic bottle with a screw-on lid. Anything clear and sturdy will work—just avoid glass if your kids are little.
Can older kids make this on their own?
Yes! It’s great for school-aged kids. They can measure, mix, and experiment with how much glue or water to use for different effects.