I love doing simple science experiments…afterall, I do have a PhD.
And science experiments that only take a few supplies and actually work? Well, those are my favorite.
This walking water experiment is one of those fun little surprises that keeps kids engaged and teaches them something cool.
It’s quick to set up, doesn’t make a big mess, and feels like a magic trick the first time you see it. And if your kid likes pouring things (mine definitely does), they’re going to love watching the water move on its own.
What You’ll Need
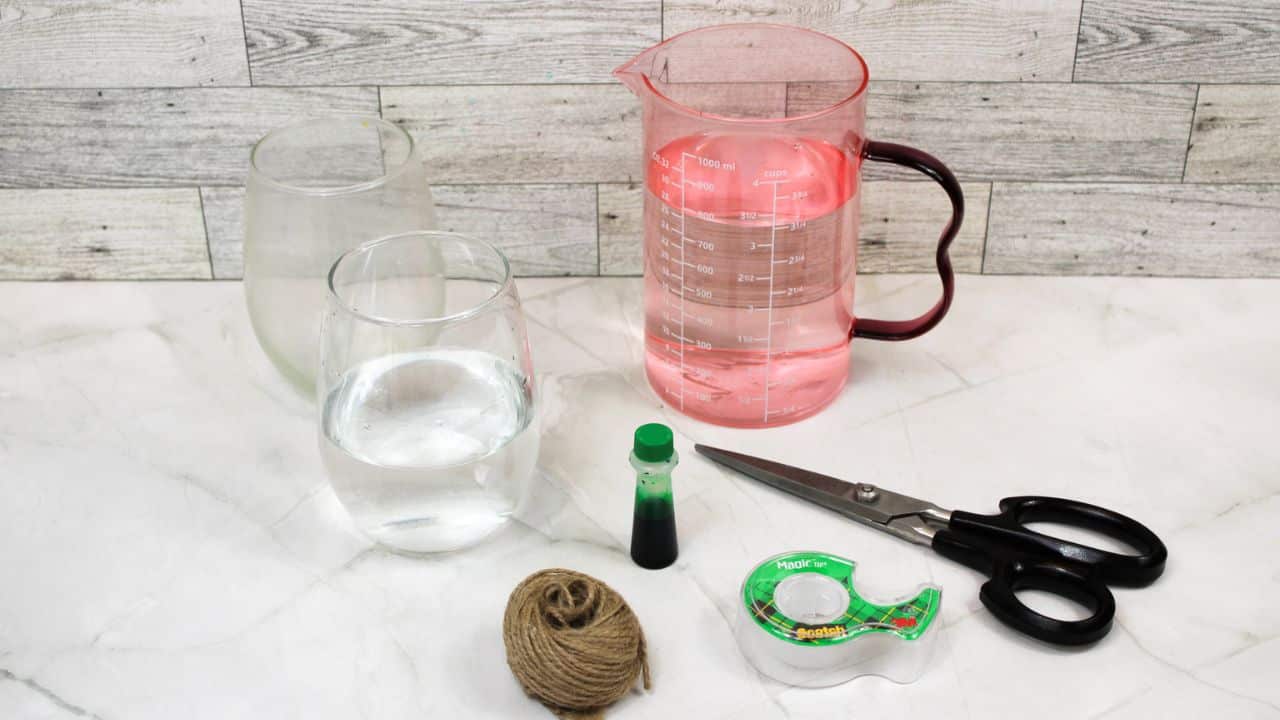
This setup is super simple and uses things you probably already have in the kitchen. The food coloring is optional, but we like using it because it makes the water walk look even cooler.
- (2) 8 oz glass cups
- Water
- Twine (or thick cotton string)
- Scissors
- Tape
- Food coloring (optional)
- Spoon
How to Do the Walking Water Experiment
The steps are easy, and your child can help with most of them (just handle the scissors yourself if they’re little). Take advantage of this time to talk about how water moves and sneak in a quick science lesson.
Step 1: Fill one cup halfway with water.
This is your starting cup. You can add food coloring now or wait until later.
Step 2: Cut a piece of twine about 6–8 inches long.
You want it long enough to reach from one cup to the other, but not dragging on the counter.
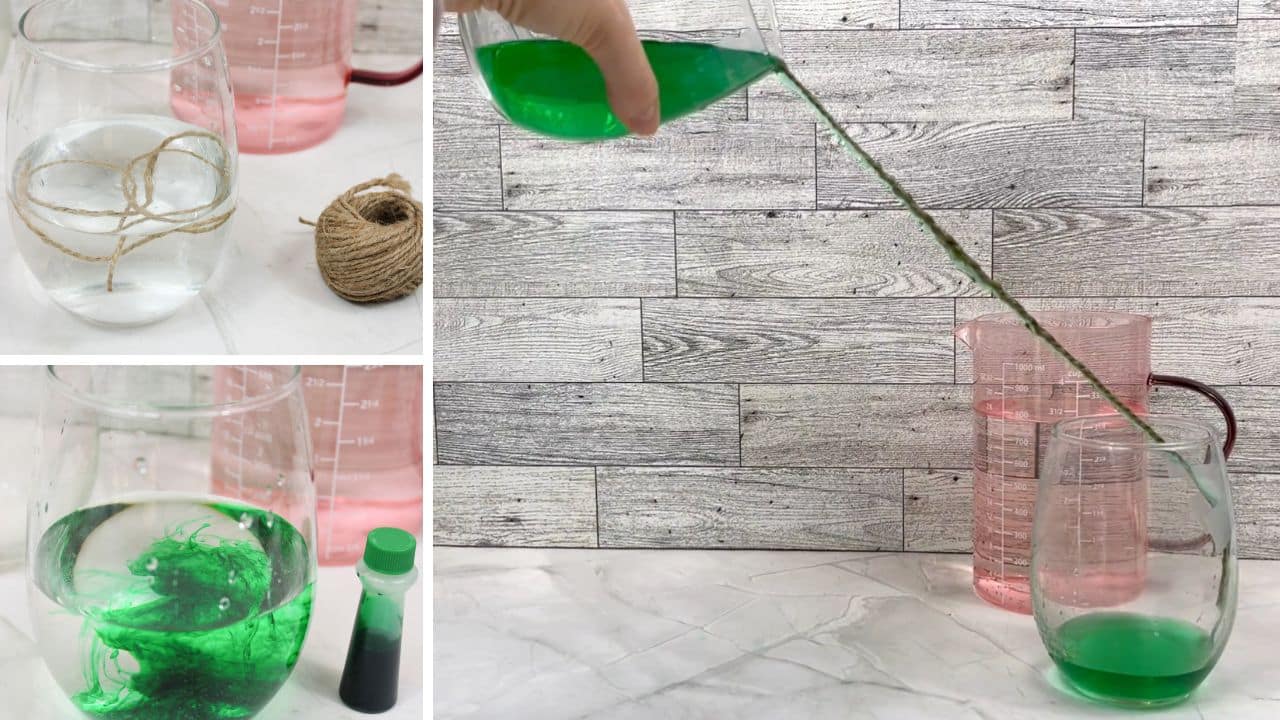
Step 3: Place the twine into the water for 2–3 minutes.
This helps it absorb the water better and makes the whole experiment work faster.
Step 4: Remove the twine and tape one end inside the empty glass.
Stick it just above the bottom so the water has somewhere to land.
Step 5: Add food coloring (if you haven’t already) and stir.
We used blue, but any color works. It makes it way easier to see the water move.
Step 6: Tape the other end of the twine inside the cup with water.
Now both cups should be connected by the damp twine.
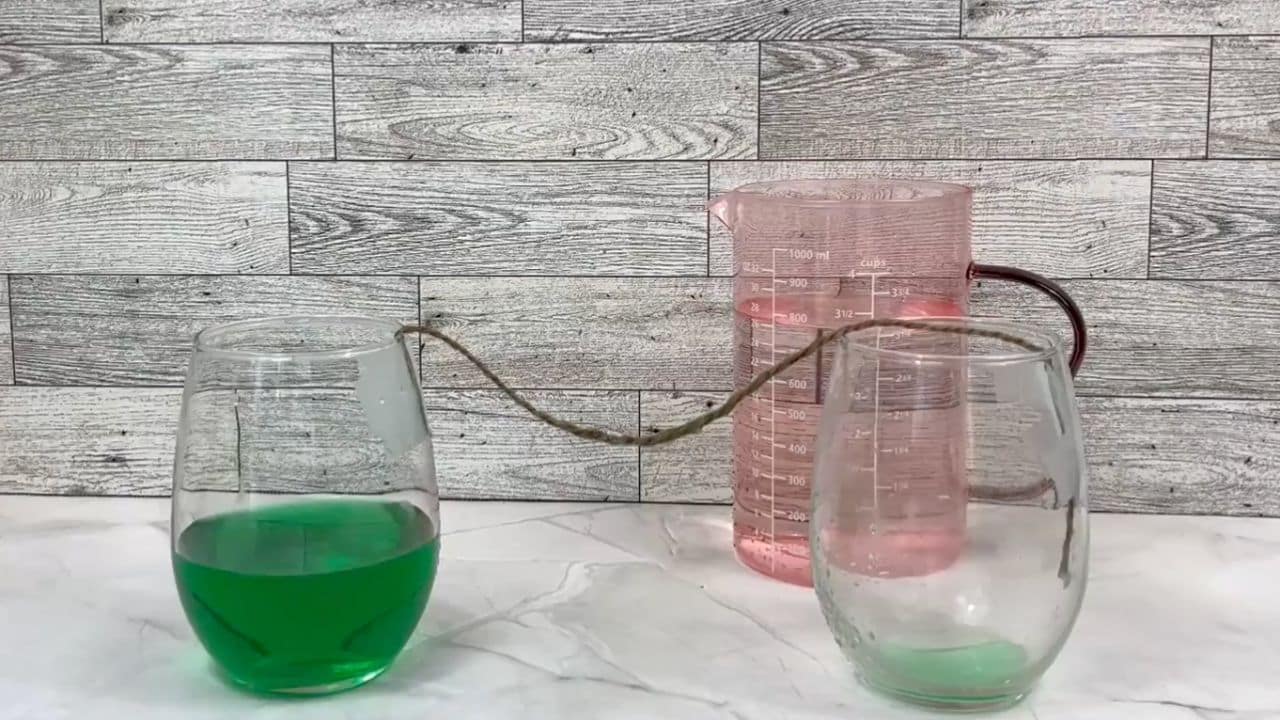
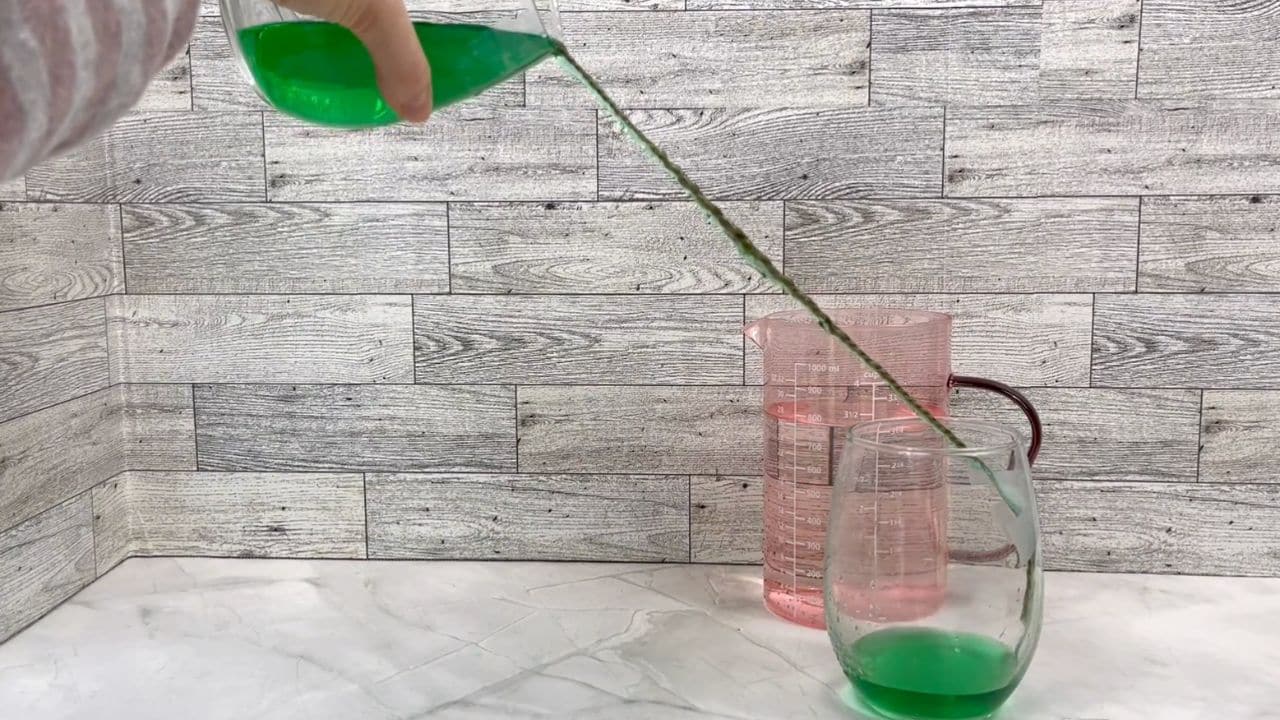
Step 7: Slowly lift the cup with water and gently pour it down the twine.
You’ll see the water travel down the twine and into the empty cup. Kids think it’s magic—turns out, it’s science.
Why Does This Happen?
This is a cool example of cohesion and adhesion.
Water molecules like to stick to each other (cohesion), and they also like to cling to surfaces like the twine (adhesion). When both things happen at once, the water sort of walks down the string, pulled by gravity and its sticky nature. It’s simple but fascinating—and honestly kind of satisfying to watch.
What I Love About This Activity
It’s quick, clean, and surprisingly fun. My son cheered yay and wow the whole time, and I didn’t even mind because cleanup took about 30 seconds. Here are some more behind-the-scenes benefits of this water walking experiment:
- Builds early science skills: Introduces concepts like gravity, cohesion, and adhesion in a fun, hands-on way.
- Encourages curiosity: Kids get to ask questions, make predictions, and explore cause and effect.
- Develops fine motor skills: Taping, pouring, and handling string are great for little hands.
- Promotes visual learning: Adding food coloring makes the movement easier to see and more engaging.
- Supports language development: Kids naturally describe what they’re seeing, which boosts vocabulary.
- Quick and low-prep: Uses materials you already have at home and takes less than 10 minutes to set up.
- Encourages focus and patience: Waiting for the water to travel teaches observation and attention.
- Makes learning feel like play: It’s fun, surprising, and feels like a magic trick…no textbooks needed.
Frequently Asked Questions
Can I use yarn or string instead of twine?
Yes, as long as it’s absorbent. Twine works best, but thick cotton string or yarn will also do the job. You can also use absorbent papertowels. Avoid anything too slippery or coated.
Does the water have to be colored?
Nope! But food coloring helps kids see the water move more clearly. It’s also just more fun.
Why doesn’t it work with dry string?
Dry string takes longer to absorb the water. Pre-wetting it helps jumpstart the movement and makes the experiment work faster.
Can we do this with more than two cups?
Absolutely! You can line up multiple cups and see how the water moves from one to the next. It’s a great way to turn this into a bigger experiment.