
When my son was a year old, he came home from daycare with a piece of tissue paper art glued to construction paper. It wasn’t fancy. Just scribbles of soft yellow (his favorite color), but I absolutely loved it.
My son and his teacher were so proud and I was in awe at the simplicity of this beautiful craft. It was so thoughtful, and something I’d never think to do on my own. Leave it to a teacher to turn tissue paper and glue into something special.
It was that moment that I realized kids don’t need much and that’s the kind of energy this coffee filter fall tree gives. It’s easy, low-prep, and kids light up watching the colors blend together. And just like that daycare art…it ends up being the kind of project you actually want to keep.
Supplies and Materials
Here are a few simple supplies to gather. You probably already have most of these at home, which makes this craft even easier to pull off on a whim. It’s truly easy and low-prep.
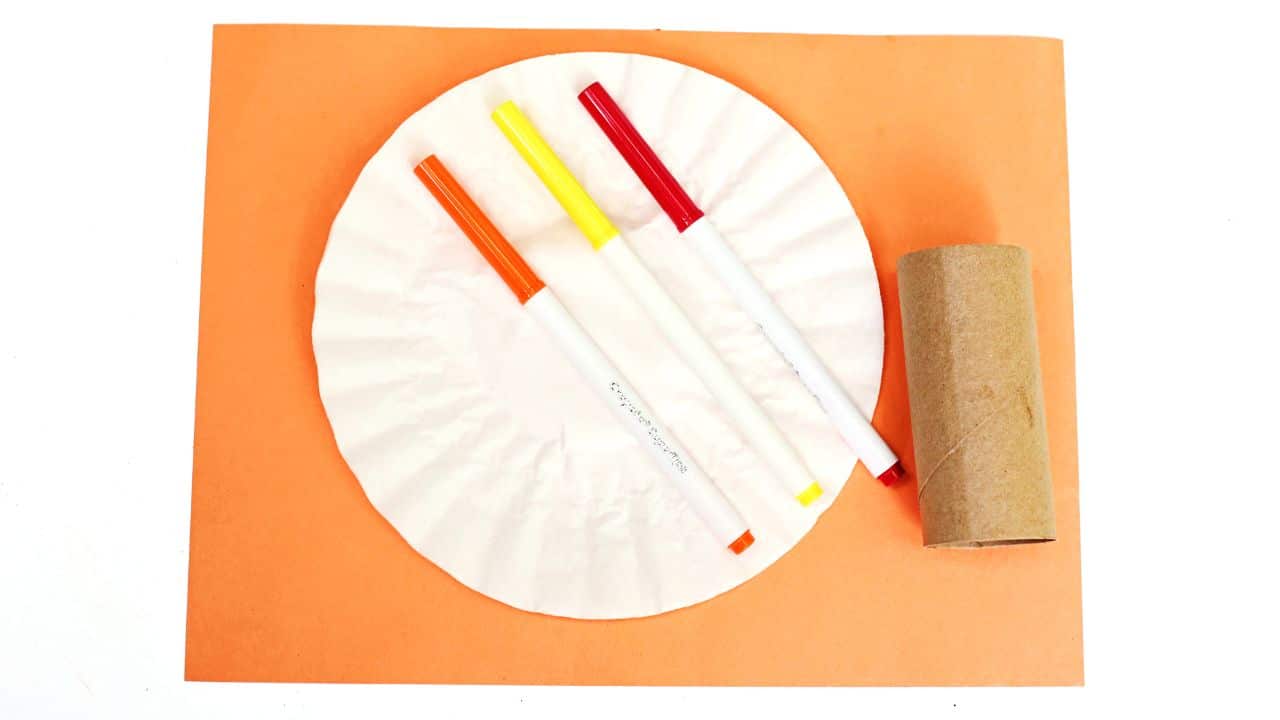
- 2 or more white coffee filters
- Washable markers (fall colors like red, orange, and yellow)
- Spray bottle filled with water
- Toilet paper roll
- Glue
Instructions
Ready to get started? This craft is super simple and kid-approved. Just follow these easy steps to bring your colorful fall tree to life—no perfection required, just fun.
Step 1: Color the Coffee Filters:
Let’s get messy—in the best way.
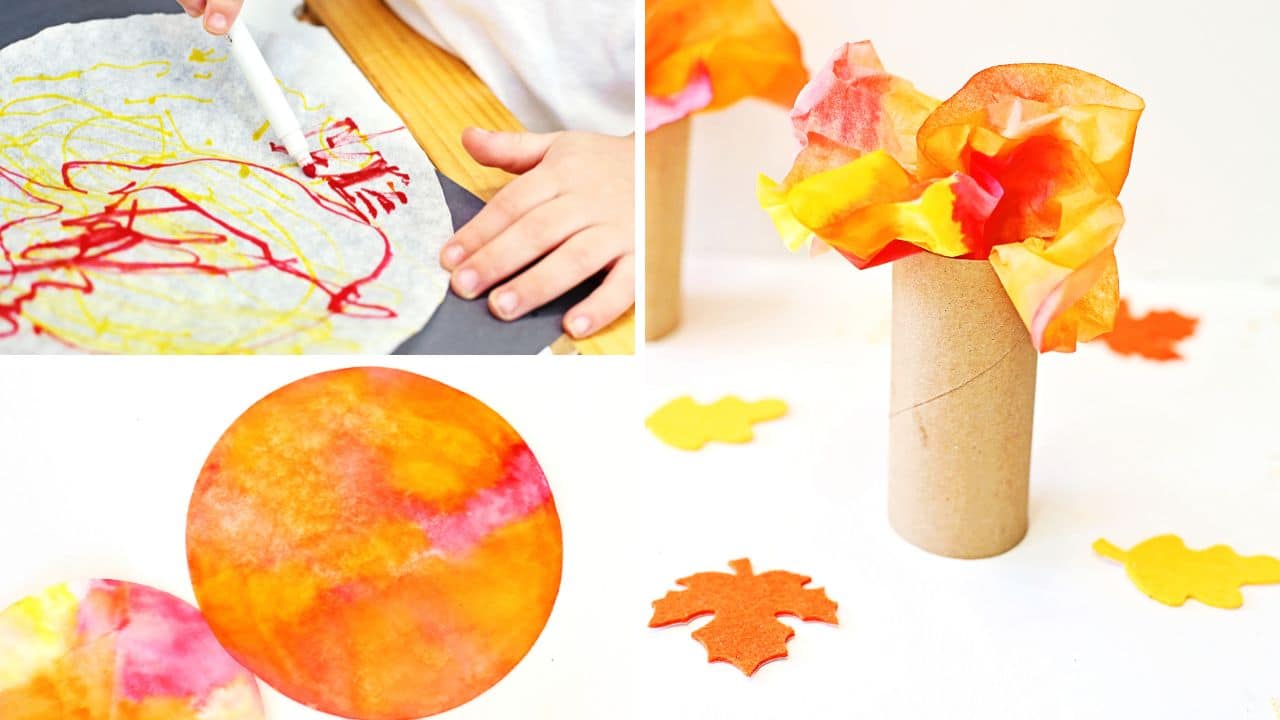
Flatten out a coffee filter on your table or crafting surface. Use your washable markers to scribble or dot the filter in fall-inspired shades like red, orange, yellow, and brown.
Don’t worry about being precise—just fill the space with rich, warm tones. The more color, the better.
Step 2: Spray with Water
Now this is the fun part for the kids.
Using your spray bottle, spritz each coffee filter until the colors start to run and swirl. You’ll see them blend together like watercolor paint.
Be generous with the water—it helps the colors mix into that dreamy, fall-leaf look.
Step 3: Let Dry Completely
Patience time. Lay your filters out flat to dry.
Depending on how wet they are, this might take a couple of hours. If you’re in a hurry, you can use a hair dryer or place them near a fan. The filters need to be completely dry before you move to the next step.
Step 4: Create the Tree Trunk
Time to build the base. Grab a toilet paper roll and stand it up vertically.
You can keep it simple and natural, or let your kids color the outside to look like bark using markers or crayons. You could even wrap it in brown paper for an extra touch.
Step 5: Attach the Colorful Leaves
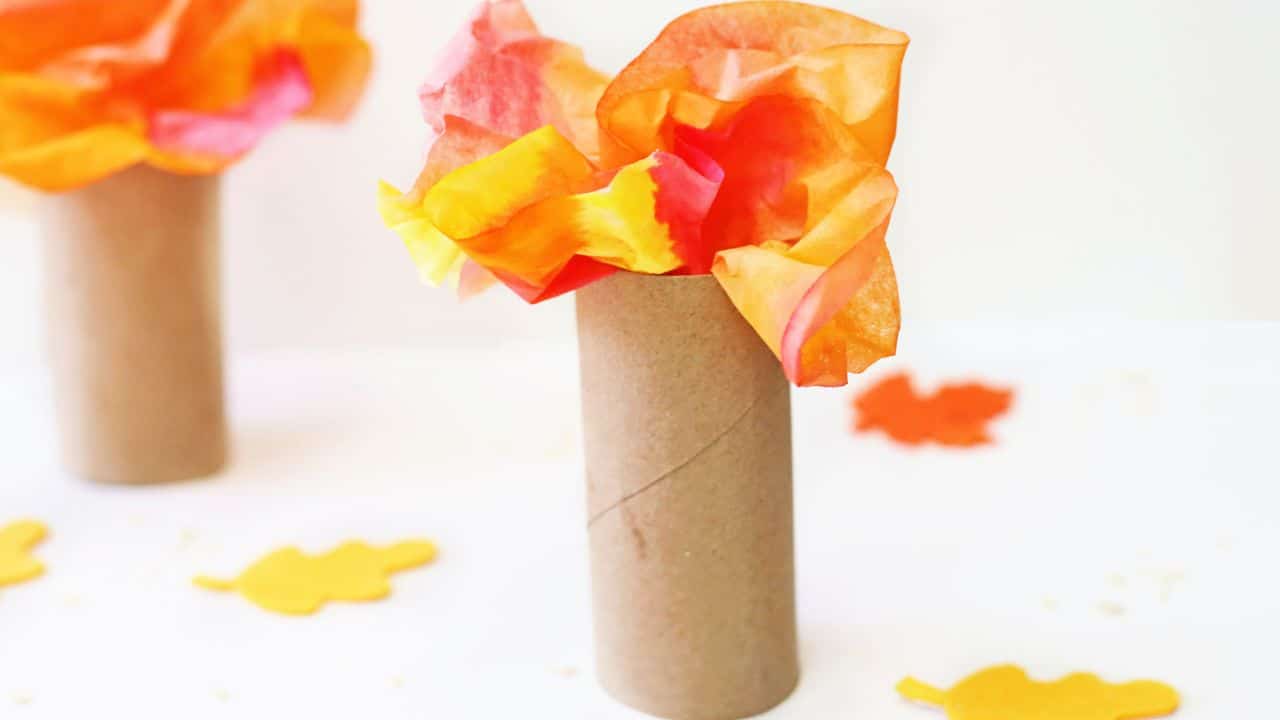
Bring it all together. Once the filters are dry, gently pinch the center of each one and scrunch it a bit to give it that puffy, leafy shape. Then, glue the scrunched part into the inside top edge of the toilet paper roll. Use one filter on each side, or stack a few for a fuller look. Let it dry completely before moving it.
Step 6: Display Your Fall Tree
You’re done—yay!
Set your finished fall tree on a table, windowsill, or bookshelf. It’s a fun way to celebrate the season with something your little ones made themselves.
Bonus: it’s mess-free once it’s dry and adds a cozy pop of color to any space.
Easy Conversation Starters While Crafting
Craft time is a great time to slow down and connect. Here are a few simple prompts you can use while you work together:
- “What colors do you think the leaves are in our backyard right now?”
Helps them connect the craft to the world around them. - “Tell me a story about where this tree lives.”
Sparks imagination and narrative thinking. - “What’s your favorite season and why?”
A great way to build emotional awareness and learn more about your child’s preferences. - “What do you think will happen when we spray the water?”
Encourages curiosity and prediction skills. - “Do you want to name your tree?”
Just for fun—but it often leads to giggles and creative thinking.
Creative Ways to Use Your Fall Tree
Once your tree is finished, you don’t have to stop there! Here are some fun and creative ways to use your fall tree beyond just setting it on a shelf:
1. Make a Mini Fall Forest
Craft a few more trees using different marker combinations and group them together on a table or windowsill. Use a piece of brown or green felt underneath to create a little forest scene.
2. Turn It into a Gratitude Tree
Cut out small paper leaves and have your kids write what they’re thankful for on each one. Tape or glue the leaves to the coffee filters or around the base of the tree trunk.
3. Use It in Sensory Play
Place the tree inside a fall-themed sensory bin with dried corn kernels, acorns, and mini pumpkins. Kids can use it as a prop while they scoop, pour, and explore.
4. Make a Storytime Centerpiece
Use the tree as a centerpiece during storytime. Read fall books like Leaf Man or We’re Going on a Leaf Hunt, and let the tree be part of the scenery.
5. Add to Your Fall Decor
Pop it on your dining table, bookshelf, or entryway next to a pumpkin or two. It makes a sweet, handmade touch to your seasonal decorations.
Frequently Asked Questions
How long does this craft take?
About 15 minutes of active crafting time, plus drying time for the filters (about 1–2 hours depending on how wet they are).
Can I use other types of markers or paint?
Water-based or washable markers work best. Permanent markers won’t blend when sprayed with water. You could also use diluted food coloring in a pinch.
What age is this craft good for?
Kids as young as 3 can help color and spray the filters (with supervision). Older kids can do the entire craft independently.
What if I don’t have a toilet paper roll?
You can use a small paper cup turned upside down with a hole poked in the top. Or roll and tape a piece of cardstock into a tube.
Can I add more than two filters?
Absolutely! Add as many as you’d like for a fuller tree. Try using different shades of fall colors for a layered, textured look.