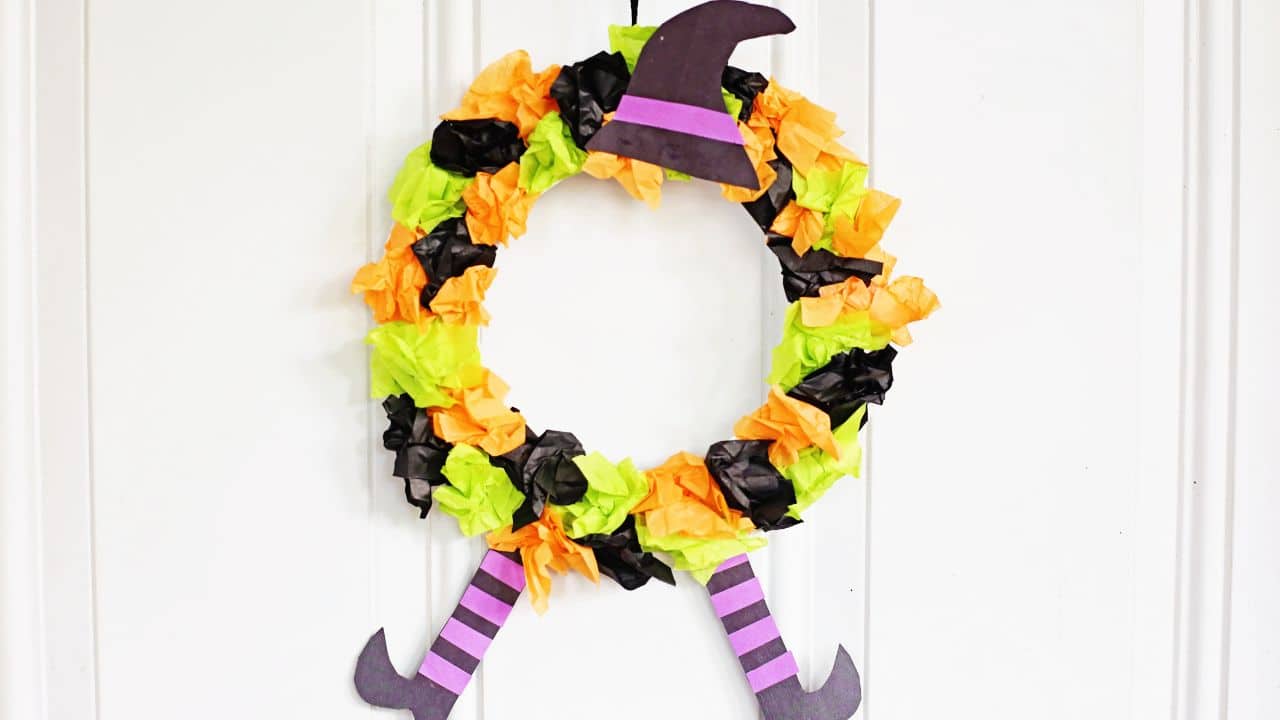
As the spooky season approaches, I love crafting with my son to create decorations that add a touch of Halloween fun to our home.
This Witch Paper Plate Wreath is a simple, creative project that’s perfect for kids and adults alike. With just a few supplies, you can make an adorable, festive wreath that adds charm to any door or wall.
It’s a wonderful way to let your little ones explore their creativity while getting into the Halloween spirit.
Supplies
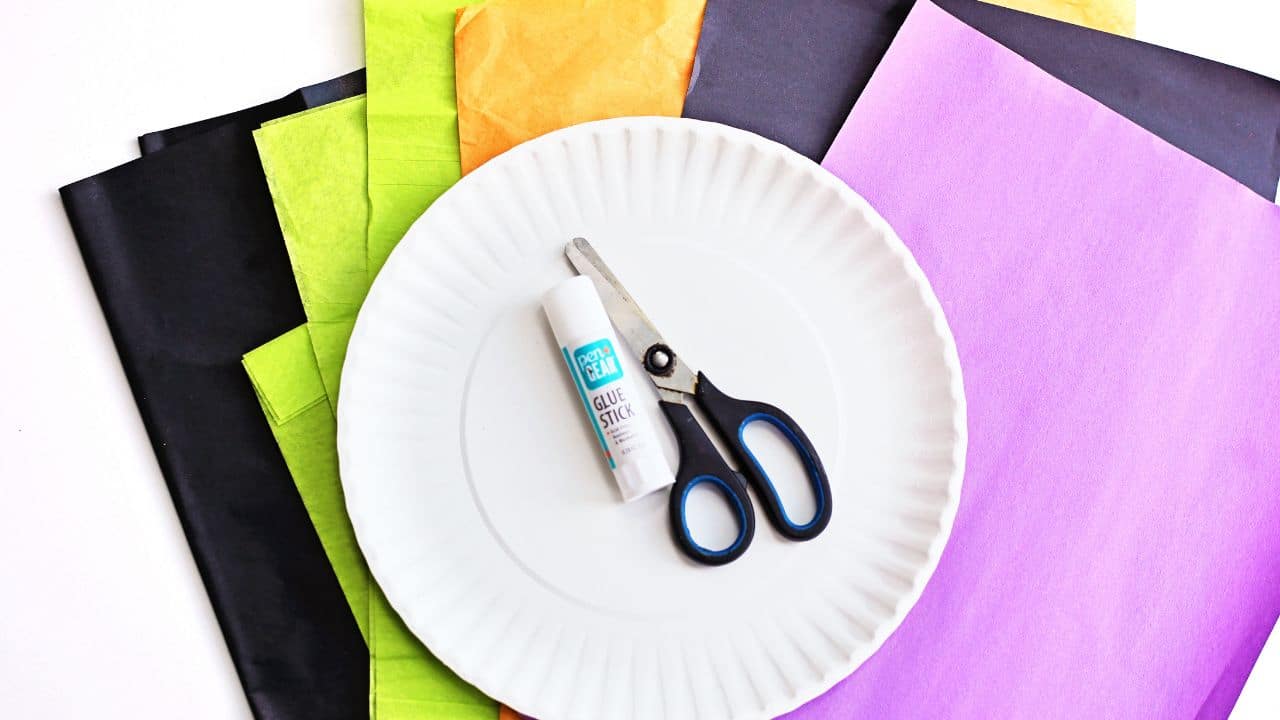
Gather these easy-to-find materials before you start crafting. The supplies list keeps things simple yet effective, and you probably have most of them at home already. Each item has a role in bringing this fun wreath to life, so let’s get started!
- Paper plate
- Orange, green, and black tissue paper
- Black and purple construction paper
- Scissors
- Glue stick or school glue
- String or yarn for hanging
- Pencil
Instructions
This one is simple and easy to make. It’s perfect for a quick craft project.
I like to draw the witch’s legs and hat myself to ensure that each wreath is unique and has its own quirky flair. You can get creative with the design, adding personal touches like striped stockings or different hat shapes.
It’s fun and customizable. What’s not to enjoy?
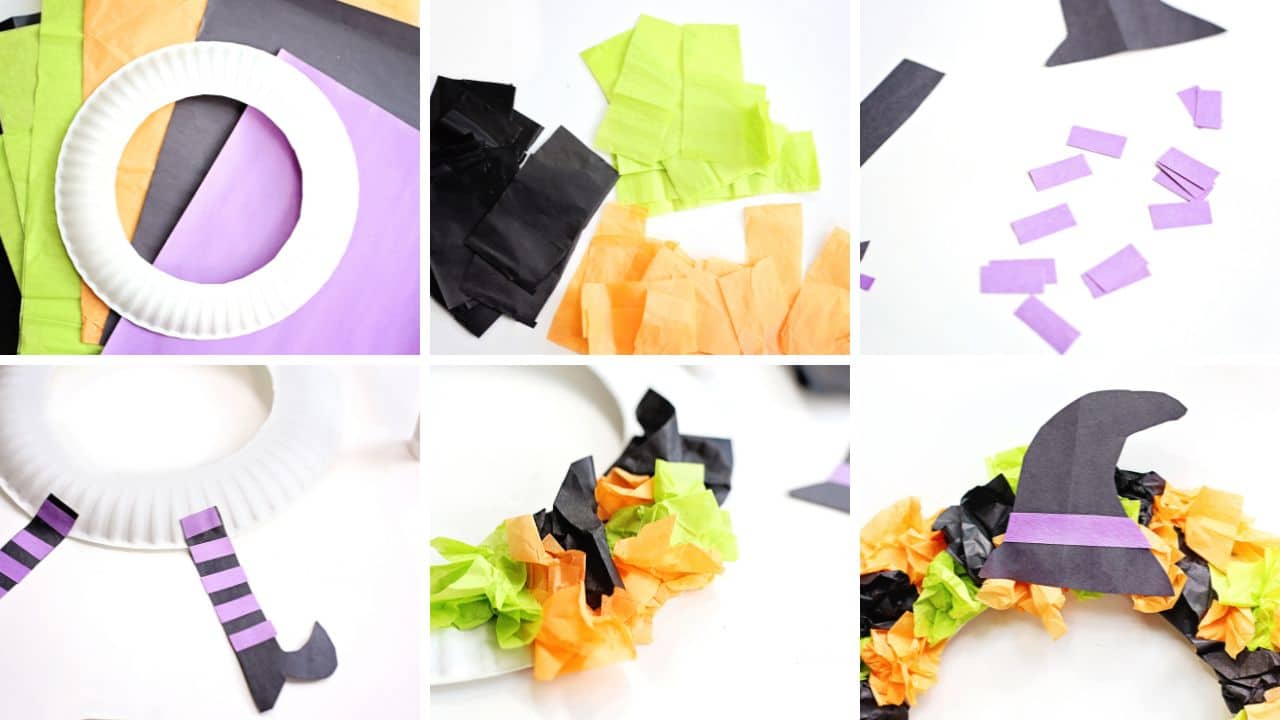
Prepare the Wreath Base:
Start by cutting out the center of the paper plate, leaving just the outer ring to form the wreath base. This will give you a sturdy foundation to work with. It’s an easy first step and ensures you have the perfect frame for your witchy creation. Feel free to adjust the size of the hole to create the wreath shape you like best.
Make the Witch Legs:
Cut two long witch legs from black construction paper, making sure they’re the right length to hang off the bottom of the wreath. To add that signature witchy look, cut thin purple strips and glue them across the legs to create striped socks. This step adds playful detail and will make the wreath stand out with its whimsical touch. When attaching the legs, glue them to the back of the wreath so they hang down, giving the effect of a witch’s legs dangling from the wreath.
Make the Witch Hat:
Next, cut out a classic witch hat shape from black construction paper. Add a small strip of purple construction paper as a band around the base of the hat for a vibrant touch. This simple addition transforms the hat into a focal point of the wreath, making it instantly recognizable. Once it’s glued, it will sit at the top of the wreath, adding the perfect finishing touch to your witchy creation.
Decorate the Wreath:
Cut the orange, green, and black tissue paper into small rectangles, preparing enough to cover the entire wreath. To add texture and a bit of spookiness, crumple each piece slightly before gluing it to the wreath base. This step will create a fun, bumpy effect and make the wreath look like it’s filled with Halloween cheer. The mix of bright colors against the dark witch hat and legs makes the wreath both lively and festive.
Add the Witch Hat:
Once your wreath is covered with the crumpled tissue paper, glue the witch hat to the top of the wreath. This will sit on top of the tissue paper, standing out with its striking purple band and pointy shape. The hat will top off the wreath perfectly, giving it a cute yet spooky Halloween look.
Hang It Up
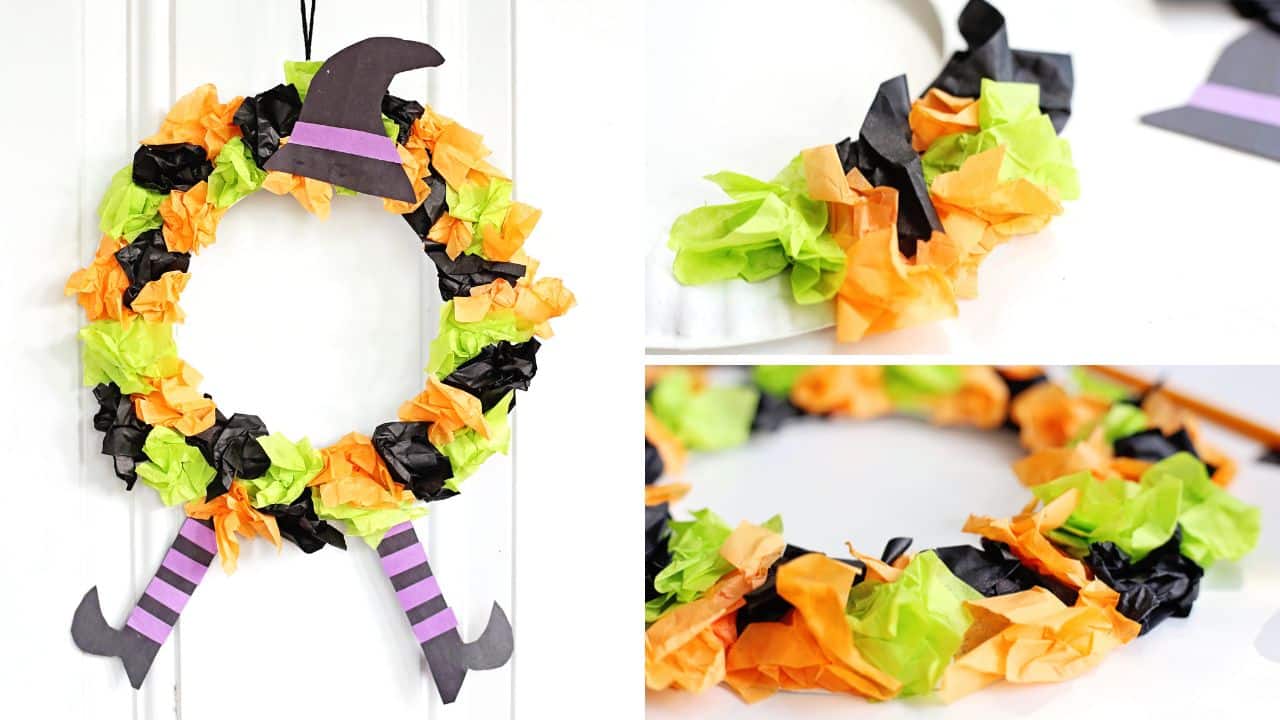
Now that your wreath is all done, it’s time to hang it up! Tape or glue a loop of string to the back of the wreath so you can easily hang it on your door or wall.
Choose a string color that complements your wreath, or go for classic black for a spooky vibe. This final step ensures that you can display your spooky creation and enjoy it all season long.
Conversation Starters
Don’t forget to make this craft a learning experience…or a bonding one. Here are a few conversation starters to make things interesting.
- What’s your favorite part of Halloween—trick-or-treating, costumes, or the decorations?
- If you could create any spooky creature for Halloween, what would it look like?
- What’s the most memorable Halloween decoration you’ve ever seen?
- What’s your favorite color to decorate with for Halloween? Do you lean more towards spooky black, bright oranges, or something else entirely?
Frequently Asked Questions:
Can I use different colors for the witch’s hat and legs?
Absolutely! Feel free to customize the colors of the witch’s hat and legs to match your home’s Halloween theme. You can experiment with various colors of construction paper to make the wreath as unique as you like!
What other materials can I use for the tissue paper?
If you don’t have tissue paper, you can use scraps of colored paper, felt, or even old magazines! Just be sure to cut them into small squares or rectangles and crumple them to maintain that fun, textured effect.
Can this project be made without a paper plate?
Yes! If you don’t have a paper plate, you can cut a ring from cardboard, poster board, or any other thick paper material. Just ensure it’s sturdy enough to hold the decorations.
How can I add more details to the wreath?
You can add more fun details like glitter, googly eyes, or even small Halloween-themed stickers. This project is easily customizable, so feel free to get creative and make it your own!