If you’re looking for an engaging activity that blends science, sensory play, and a touch of prehistoric fun, this dinosaur skeleton sensory bag is a must-try.
It’s mess-free, quick to make, and a huge hit with curious kids who love dinosaurs..being honest, that’s most of them.
Whether you’re a parent, teacher, or caregiver, this craft delivers a mini excavation site right to your kitchen table.
Why Kids Love It (and You Will Too)
Sensory bags help kids explore textures, colors, and motion, all while keeping the mess inside the bag. This one adds a paleontology twist: a printable dinosaur skeleton that makes it feel like a real fossil dig. It’s the perfect activity to pair with a dinosaur-themed story, museum day, or rainy afternoon.
Supplies You’ll Need:

- 1 gallon-size ziplock baggie
- Rubbing alcohol and a pad or paper towel
- 16 oz clear hair gel
- 1–2 drops brown food coloring
- Tape (painter’s tape or duct tape)
- Cardstock or plain computer paper (white)
- Dinosaur Skeleton Printable (your fossil)
Step-by-Step Directions:
Step 1: Gather Your Supplies
Make sure you have everything laid out before you begin. This helps the project go smoothly—especially if little hands are helping.
Step 2: Prep the Bag
Use an alcohol pad or a paper towel with rubbing alcohol to wipe off the label on the front of the ziplock bag. This gives you a clear window to see the fossil action.
Step 3: Create Your Dirt
Squeeze the clear hair gel into the bag. Add 1–2 drops of brown food coloring. This gives your dig site a muddy, earthy look—perfect for fossils.
Step 4: Mix it Up
Seal the bag temporarily and gently massage it to mix the coloring into the gel. Make sure the color is even but don’t stress if there are slight streaks—nature isn’t perfect either.
Step 5: Remove Air and Seal
Open the bag slightly and press out as much air as possible before sealing it again. Less air means less chance of bursting and more squish-friendly play.
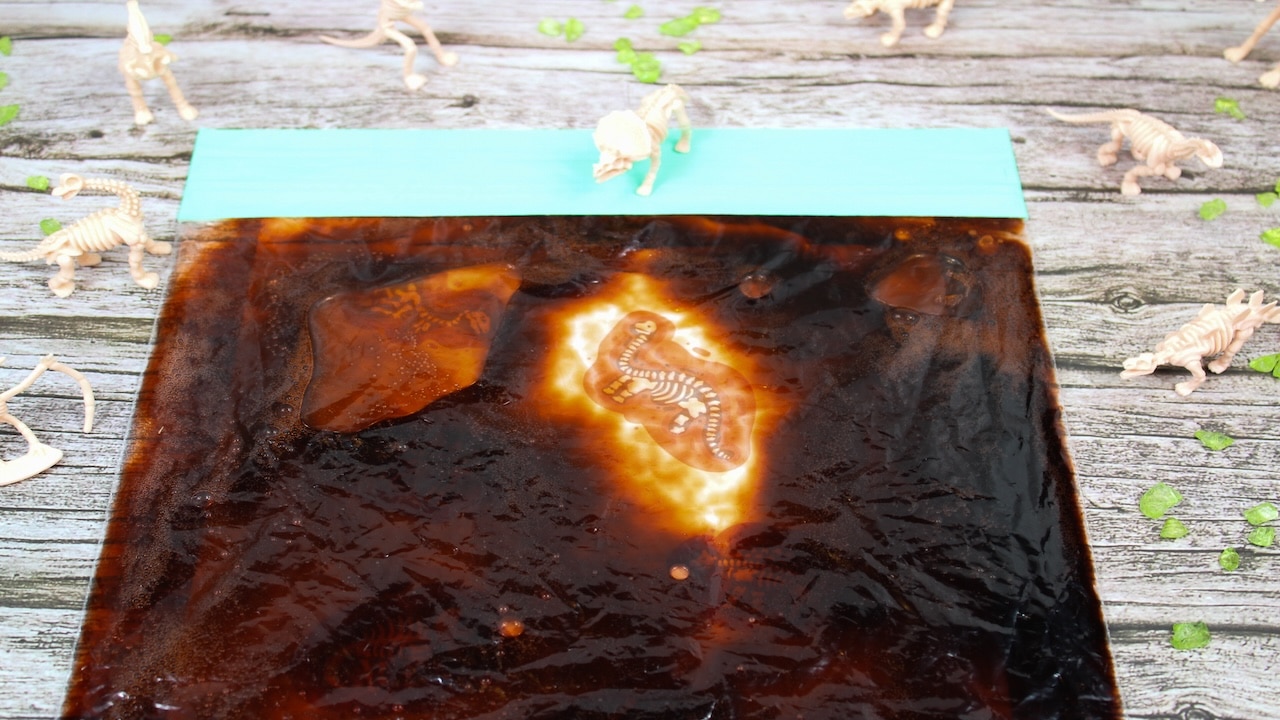
Step 6: Tape It Down
Tape the bag shut at the top with duct or painter’s tape for extra security. Then print and cut out the dinosaur skeleton printable and tape it to the back of the bag. Now it looks like your little one is uncovering real bones as they squish and move the gel around.

Step 7: Play Time!
Let kids explore! They can dig for bones using their fingers or a toy stick on the outside of the bag. It’s a quiet, calming activity with just the right amount of educational flair.

Tips and Variations
- Use different dinosaur printables and rotate them for new discoveries.
- Try adding small plastic bones or dinosaur figurines inside the bag for 3D exploration.
- For older kids, add a magnifying glass and turn it into a scientific investigation.
Bringing the Jurassic to Life

This dinosaur skeleton sensory bag is more than just a craft…it’s an imaginative adventure. It teaches patience, promotes fine motor skills, and gives kids a sneak peek into paleontology, all without getting dirt under their nails. So grab your gel, print your skeleton, and start digging!
Want the free printable skeleton to get started? Drop your email below and we’ll send it straight to your inbox.
Frequently Asked Questions
Q: What is a sensory bag?
A: A sensory bag is a sealed, mess-free bag filled with squishy materials like hair gel, water beads, or slime, often combined with objects for kids to explore through touch. It’s designed to stimulate the senses—especially touch and sight—while helping kids build fine motor skills, focus, and creativity.
Q: What age is this activity best for?
A: This sensory bag is ideal for toddlers and preschoolers (ages 2–5), but older kids may also enjoy it—especially if they’re into dinosaurs!
Q: Is the bag reusable?
A: Yes! As long as it’s sealed properly and handled with care, the sensory bag can be used multiple times. Just store it flat when not in use.
Q: Can I use something other than hair gel?
A: Clear hair gel works best for visibility and squishiness, but you can also use aloe vera gel or a mix of water and cornstarch for a different texture.
Q: What if I don’t have brown food coloring?
A: No problem! You can mix red, yellow, and a tiny bit of blue to make brown—or skip the coloring and just use the clear gel for a cleaner look.
Q: How do I keep the bag from leaking?
A: Remove as much air as possible before sealing and secure the top with strong tape. For extra protection, double-bag it or use packing tape along the edges.
Q: Where can I get the dinosaur skeleton printable?
A: You can make your own or download the free printable directly from our site. We love it because it’s sized perfectly to fit behind a gallon-size bag.
Q: Can I put real toys or objects inside the bag?
A: Yes, small plastic dinosaurs or bone-shaped erasers work great. Just make sure they’re not sharp and won’t puncture the bag.