Give a child a pile of sticks, some leaves, and a little dirt, and suddenly you’re watching a whole world unfold.
A fort. A nest. A secret forest hideout. Nature play isn’t just good for them—it’s instinctual. It slows them down, helps them focus, and invites them to notice the tiny details most of us walk right past.
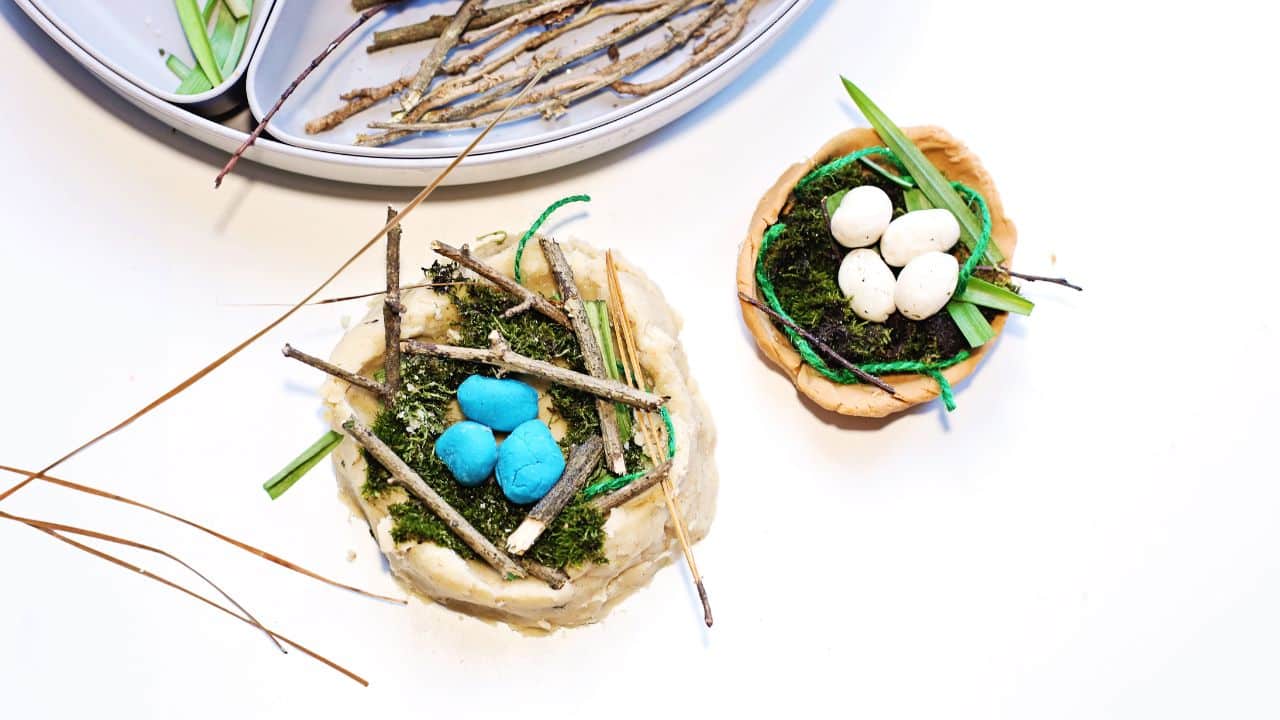
That’s exactly why we put together this Build a Bird Nest Activity. It’s hands-on, sensory-rich, and gently inspired by the way birds gather twigs, moss, and whatever they can find to create a safe place for their eggs. It lets kids tap into that same creativity and care, with a little help from play dough and some nature treasures.
They’ll think they’re just playing. But you’ll know they’re building patience, problem-solving, and imagination…one stick at a time.
Supplies and Materials

You can gather most of the nature items right from your backyard, a walk in the park, or even a quick stroll through the neighborhood. Collecting them together is part of the fun!
- Round sectioned tray or chip-and-dip platter – helps organize materials and gives kids choice
- Brown or tan play dough – forms the base of the nest
- Blue and/or white play dough – for making little eggs
- Nature items – small twigs, moss, grass, bark, pine needles, dried leaves
- Twine or raffia – optional, for a woven look or added texture
How to Build a Bird Nest

Before the nest-building begins, it helps to set the stage. Organizing the materials in a sectioned tray or chip-and-dip platter makes it easy for kids to see their options, choose what they need, and dive right into the creative process.
- Gather your supplies: Set out all the materials in a round sectioned tray or chip-and-dip platter to give kids options and keep things organized.
- Form the base: Start by helping your child roll and shape the brown or tan play dough into a rough bowl. It doesn’t have to be perfect—nature isn’t! The key is giving them the feel of creating a space that holds something, like a real bird nest would. If your child is younger, they might need a little help pressing the dough into a shape. Older kids might try coiling the dough like clay to form the sides.
- Now comes the fun sensory layering: Encourage kids to gently press sticks, moss, grass, or pine needles into the outside of the nest. Show them how to follow the shape so it doesn’t collapse. If twigs are too long, ask: Can we break them? Can we bend them? Can they be layered like spaghetti? This part isn’t just creative—it’s problem solving in disguise. Build the bird nests using everything you’ve found and watch their creativity light up.
- Create the eggs: Once the nest is complete, it’s time to make little eggs! Roll small ovals from the blue and white play dough and gently place them in the center of the nest. You can even count them, name them, or create a story about what kind of bird laid them.
Encourage Creative Thinking and Sensory Exploration

As they build, invite them to slow down and explore how everything feels, smells, and fits together. This kind of hands-on problem solving strengthens their fine motor skills, vocabulary, and awareness of the natural world. Try prompting with questions like:
- What kind of bird do you think would live in this nest?
- Can you bend or break that stick to make it fit better?
- What happens if you weave that piece of twine between the others?
- How does that leaf feel—soft, bumpy, dry?
- What does the bark or pine needles smell like?
- How many eggs can your nest hold? Should they all be the same color?
Why We Loved This Activity

Whether you’re learning about birds, building nature-themed units, or just want a peaceful sensory activity that actually holds your child’s attention—this one is worth repeating.
- It felt slow and intentional.
- It encouraged outdoor exploration.
- It combined sensory play with storytelling.
- It was flexible enough for all ages.
Other Nature-inspiring Activities
- Water Flow Creek Exploration
- Little Hands, Big Creek Sensory Bin
Frequently Asked Questions
Can I use air-dry clay or natural clay instead of play dough?
Yes! Just make sure it’s soft enough for kids to work with. Air-dry clay adds a bit more durability if you want to keep the nests long-term.
What age is this activity good for?
This works best for ages 3–8, but older kids can get really into the detail of design and nesting patterns. Younger kids may need help shaping the dough but will love adding twigs and moss.
What if I don’t have nature items nearby?
You can substitute with shredded paper, twine, or raffia for a similar tactile experience. Even cotton balls or fabric scraps can create interesting texture.
Can we do this outside?
Absolutely. In fact, it’s a great way to keep the mess outdoors and add even more natural elements right into the mix.

Leave a Reply